
Azino - Nonprofit Charity Elementor Template Kit
Author
themesflat
Published
Aug 11, 2025
Item Code
496775ed-8dcd-4f19-b9b0-1ebfa7e45c90
How to Download
- 1 Copy the Item Code above
- 2 Go to fuckdcma.com
- 3 Paste the code in the text box and click "Generate Download Link"
About This Item
## Azino - Nonprofit Charity Template Kit
Azino - Nonprofit Charity Template Kit is created especially for the creation of multipurpose sites such as charity, donation, events, ngo, foundation, fundraising, nonprofit, religion, organization, volunteer, and all other charity and NGO websites.
This template has a professional design with a 100% responsive layout, is retina-ready, and is incredibly easy to edit because it is built with Elementor, so you don't need to write a single line of code!
### Kit Key Features:
No Coding Knowledge Needed
Fully with Elementor free version ( Elementor Pro is not required )
Header & Footer Builder Included
Unique and Modern Style.
Super Clear and Clean Layout
Cross browser compatible
Post Widget
Carousel Slide Box ( Create sliders with anything )
Ultra Responsive and Retina Ready
Compatible with most WordPress themes
Optimized for search engines
### Plugins installed with kit :
Elementor
Themesflat Addons For Elementor
MetForm
ElementsKit Lite
Give - Donation Plugin (optional for online donations)
GiveWP Donation Widgets for Elementor (optional for online donations)
How to Use Template Kits:
1. Install and Activate the "Envato Elements" plugin from Plugins > Add New in WordPress. You do NOT need an Envato Elements subscription to use this plugin to install kits.
2. Download your kit file and Do not unzip it! If you have Safari, ensure "open safe files after downloading" is not enabled in preferences.
3. Go to Elements > Installed Kits and click the Upload Template Kit button. You may also import automatically by clicking Connect Account to link your Elements subscription, then import under Elements > Template Kits.
4. Check for the orange banner at the top and click Install Requirements to load any plugins the kit uses
Note: If you will be using GiveWP, click on Plugins and you should be redirected to the GiveWP setup. You must have at least one form and one goal enabled for that content to appear in templates.
5. Return to Elements > Installed Kit and Click import on the Global Kit Styles first
6. Click Import on one template at a time. These are stored in Elementor under Templates > Saved Templates.
7. Go to Pages and create a new page and click Edit with Elementor
8. Click the gear icon at lower-left of the builder to view page settings and choose Elementor Full Width and hide page title
9. Click the gray folder icon to access My Templates tab and then Import the page you'd like to customize.
If you have Elementor Pro, headers and footers may be customized under Theme Builder.
Detailed Guide:
For further support, go to Elementor > Get Help in WordPress menu.
How to Import Metforms
1. Import the metform block templates
2. Import the page template where the form appears and right-click to enable the Navigator
3. Locate and select the Metform widget and click Edit Form. Choose New, then Edit Form. The builder will appear
4. Click ‘Add Template’ grey folder icon.
5. Click ‘My Templates’ tab.
6. Choose your imported metform template, then click ‘Insert’ (click No for page settings).
7. Once the template is loaded, make any desired customizations and click ‘Update & Close’ The form will appear in the template
8. Click Update
Setup Global Header and Footer in ElementsKit
1. Import the header and footer template
2. Go to ElementsKit > Header Footer and click Add New (if prompted with a wizard, you may click Next through it without taking any action)
3. Title the header, leave Entire Site selected and toggle Activation to On
4. Click the gray Edit Content button to load the builder
5. Click the gray folder icon and select the header template to import, select your menu in the nav element and click Update.
6. Repeat for Footer
How to Setup Tab content
1.Import the slide/tab block.You may import more than once and find copies under Templates > Saved Templates to customize.
2.Import the template where the slides/tabs appear.
3.Right click the page to open the Navigator and locate the Carousel or Tabs widget
4.Select the slide or tab template from the dropdowns on the general tab of the element options.
This Template Kit uses demo images from Envato Elements. You will need to license these images from Envato Elements to use them on your website, or you can substitute them with your own.
More from themesflat
View all →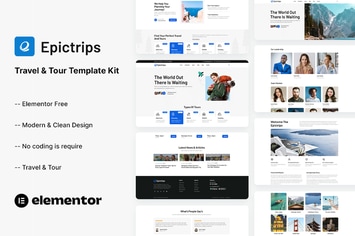
EpicTrips - Travel & Tour Elementor Template Kit
by themesflat

Widocline - Professional Window Cleaning Services Template Kit
by themesflat

Indro - Business Consulting Elementor Template Kit
by themesflat

Onatrix - Finance Consulting & Business Elementor Template Kit
by themesflat

Xstar - Creative Agency & Portfolio WordPress Them
by themesflat
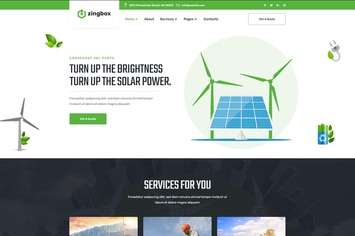
Zingbox – Wind & Solar Energy HTML Template
by themesflat

Rockie - Crypto Exchange HTML Template
by themesflat

ICOLand | NFT landing page & Crypto HTML Template
by themesflat
You May Also Like

Translang
by axiomthemes

Crework
by axiomthemes

Accordion Slider PRO - Responsive WordPress Plugin
by LambertGroup

Nikado -Responsive Theme for WooCommerce WordPress
by Plaza-Themes

Heavy - Industrial WordPress Theme
by cmsmasters
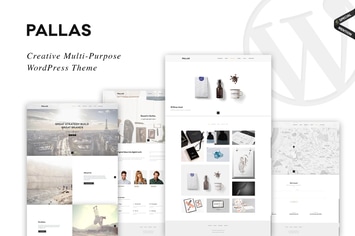
Pallas - Creative Multi-Purpose WordPress Theme
by OceanThemes

Maco | Gym and Fitness WordPress Theme
by themesawesome

Caliris - Responsive One Page WordPress Theme
by CocoBasic