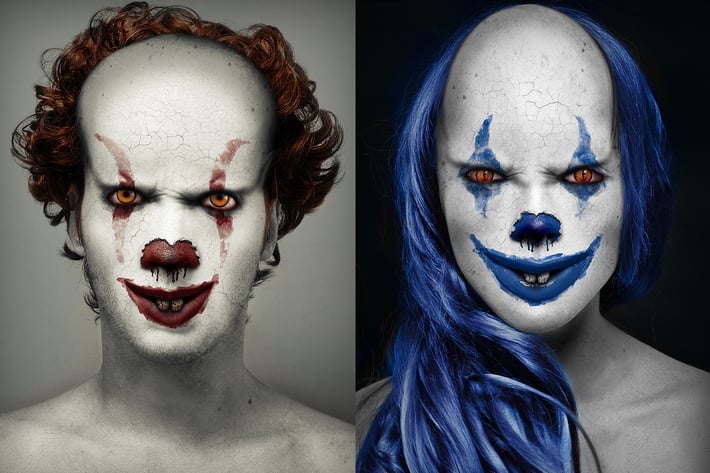
Clown Photoshop Action
Author
Eugene-design
Published
Jan 11, 2021
Item Code
92b65d1b-c571-44ac-b93d-2d8d3ea1d64e
How to Download
- 1 Copy the Item Code above
- 2 Go to fuckdcma.com
- 3 Paste the code in the text box and click "Generate Download Link"
About This Item
Clown action turns a face into clown face. Action contains 10 types of eyes, 6 paint options for eyes, 5 special horror effects, 3 paint options for mouth and many other interesting tools. You can easy create your unique clown using this action. Also action contains 10 standard color FX. Save hours of work with this action. After action finish the work you get a well-organized and structured file with the many layers, folders and settings to improve the final result. Action perfectly work on Mac and PC.
Link on the detailed video tutorial for this action included in Help file.txt
This action has been created and optimized for use on Photoshop CS3, CS4, CS5, CS6, CC 2014 - СС 2022 OR NEWER and ONLY FOR THE ENGLISH VERSION OF PHOTOSHOP. Need to change the language of your version?! How to change language in photoshop watch on youtube. The link under videotutorial.
How to configure Photoshop to work with actions.
1. Make sure you are using the English version of Photoshop.
Each action has been created and optimized to work only with the English version of Photoshop, so please make sure that you are using this version. If not, don’t worry: you can change the language of your version of Photoshop to English (and switch back again)
By the way, my best selling Double Exposure Action has recently been updated, and you can now use it with the English, German, French, Italian, Spanish, Dutch, Danish and Czech versions of Photoshop.
2. Use the RGB Mode and 8 Bits color.
To check these settings, go to Image->Mode and check the “RGB color” and “8 Bits/Channel”.
3. Make sure that the option “Add ‘copy’ to Copied Layers and Groups” is turned on.
This option applies only to CS5 and later versions of Photoshop. On the “LAYERS” panel, click on the menu icon, go to “Panel Options…”, and check that the “Add ‘copy’ to Copied Layers and Groups” is turned on.
4. Use a photo with 72dpi or higher.
If you are using a photo with less than 72dpi, the action will not function correctly. To fix this, go to Image->Image Size and increase the resolution value.
5. Set the Opacity of brush to 100%.
Set the Opacity of the brush to 100%. Select the “Brush Tool” and move the opacity slider to 100%.
How to combine my actions?
1. Open your photo
2. Play the first action
3. Save the result as an image
4. Open the previously saved image
5. Play the second action
More from Eugene-design
View all →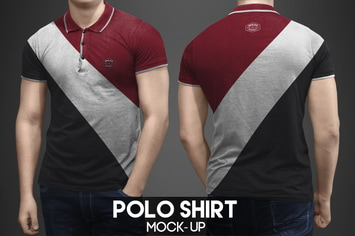
Polo Shirt Mock-Up
by Eugene-design

Landscape Brochure Mock-Up
by Eugene-design
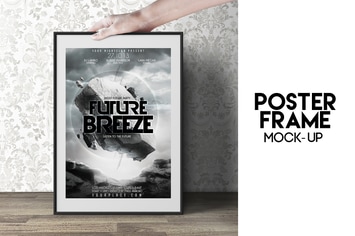
Poster Frame Mock-Up
by Eugene-design
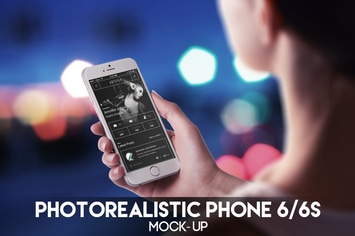
Photorealistic Phone 6 Mock-Up
by Eugene-design
Epic Photoshop Action
by Eugene-design

Code Art Photoshop Action
by Eugene-design

Double Exposure Photoshop Action
by Eugene-design
Digital Sketch Photoshop Action
by Eugene-design
You May Also Like
30 Laser Photoshop Stamp Brushes
by M-e-f
Machine Washed Photoshop Brush Presets
by GraphicMonkee
SoHDR Photoshop Action
by sodasong

Lively Photoshop Action
by sevenstyles
Watercolor Photoshop Action
by sevenstyles
Redhead Photoshop Action
by Presetrain
Finest Vintage - Illustrator Brushes
by JRChild

Instagram Blogger Lightroom Presets Pack
by creativetacos