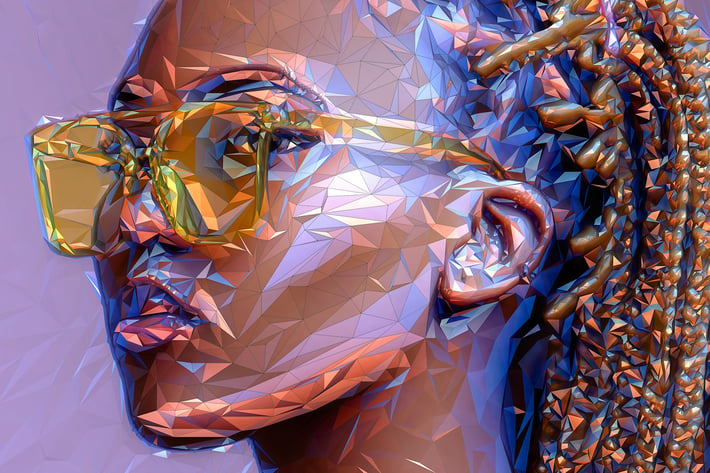
Polygon Photo Effect for Photoshop
Author
sevenstyles
Published
Jun 23, 2021
Item Code
c1f6f433-2c55-4c27-8fcc-9a9bbd0ae2b2
How to Download
- 1 Copy the Item Code above
- 2 Go to fuckdcma.com
- 3 Paste the code in the text box and click "Generate Download Link"
About This Item
For CC 2015, CC 2017, CC 2018, CC 2019 only.
Photoshop have discontinued their 3D tools, so this Photoshop Action is only available with the above mentioned versions.
If you need any of these versions of Photoshop, you can install multiple versions with creative cloud.
The Action uses Photoshop's 3D capabilities and the Oil Paint filter, please ensure you have a compatible graphics card. You can learn more about Photoshop's GPU recommendations here.
To ensure you can use Photoshop 3D, open any photo and go to the menu '3D'. If the top menu item 'New 3D Layer From File...' is clickable, then you are set up to use Photoshop 3D.
To ensure you can use the Oil Paint filter, open a photo and ensure the document color mode is set to RGB (Go to the menu 'Image > Mode' to check this). Next, go to the menu 'Filter > Stylize'. If the 'Oil Paint' option is clickable, then you are setup to use the Oil Paint filter.
Below are some key features of the Polygon Photoshop Action...
Re-light and color your image using the colors from any photo you choose. Demonstrated at 7:05 of the video tutorial.
Rotate the image you are using to color and light your design into any position. Every rotation will create a unique look to your design. Demonstrated at 10:25 of the video tutorial
Choose from 7 levels of polygon detail
Use and color the wireframes separately
Control the brightness/contrast of different tonal ranges in your design
Apply glows to the highlights of your design with one click
Choose from 30 color options
Use a transparent image to apply the effect to
Important to know
Make sure you are using the English version of Photoshop to run the Action on. All Sevenstyles Actions will only work in the English version of Photoshop.
Check you are using a version of Photoshop that the Action supports.
Watch the video tutorial to ensure you have your Photoshop file setup correctly. The tutorial link is included in the download.
Use high-resolution photos with the Action for the best results and to avoid errors. An optimal photo resolution is between 3000px – 4500px.
With Adobe Creative Cloud, you can install multiple versions of Photoshop. If you like this Action but is not supported on your version of Photoshop, you can always install an additional version of Photoshop to run the Action on. Once an Action has been tested and working on a version of Photoshop, it will always work.
Use Jpeg images to run the Action on. Other file types such as TIFF, BMP, PNG, PSD can cause issues with Actions, as Photoshop disables various features for different file types.
If a Sevenstyles Action includes a brush (.abr), pattern (.pat) or shapes (.csh) file in the download, then it must be loaded into Photoshop before playing the Action.
Avoid using the Action on logos or clip art style images as the lack of detail and color contrast can lead to errors.
Having troubles with the Action?
Double-check you have your file set up correctly as shown at the beginning of the video tutorial.
Check the resolution of your photo. If its a low-resolution photo (
More from sevenstyles
View all →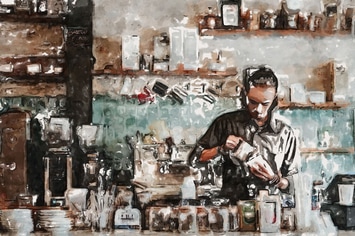
Watercolor Sketch Photoshop Effect
by sevenstyles
Mixed Texture Photo Effect
by sevenstyles
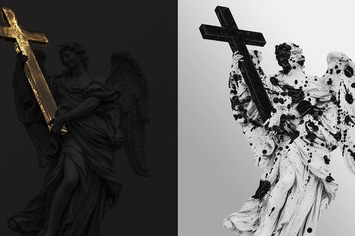
Destrukt Photoshop Action
by sevenstyles

Energy Photoshop Action
by sevenstyles
Glory Photoshop Action
by sevenstyles
Cell Shader 2 Photoshop Action
by sevenstyles
Hologram Photoshop Action
by sevenstyles
Architekt 2 Photoshop Action
by sevenstyles
You May Also Like
80s Retro Illustrator Styles
by Minhaj

Illuminati Woodcut Brushes
by andrewtimothy
Watercolor Vector Art Brushes
by AnnaIvanir
Hacking Animation Photoshop Action
by sreda

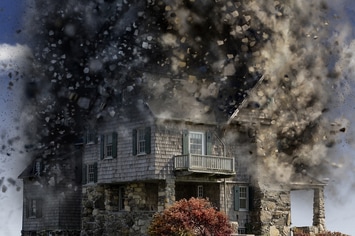
Falltime Photoshop Actions
by Presetrain
Duotone Photoshop Action Bundle
by micromove

Double Exposure Photoshop Action
by sreda
Floral Watercolor PS Stamp Brushes
by AnnaIvanir